Check-In Launcher: Interface Solutions
In my first year as a Rock Program Manager at a multi-site church, the check-in process was a frequent source of panic texts from staff, often interrupting me while I was trying to attend a service.
As you're aware, check-in encompasses numerous components, any of which, if selected incorrectly, can result in stressed staff, frustrated volunteers, and upset parents. It's no surprise that Spark now offers a dedicated check-in class. Understanding the intricacies of check-in not only guides you toward best practices but also highlights the importance of avoiding over-customization in certain areas.
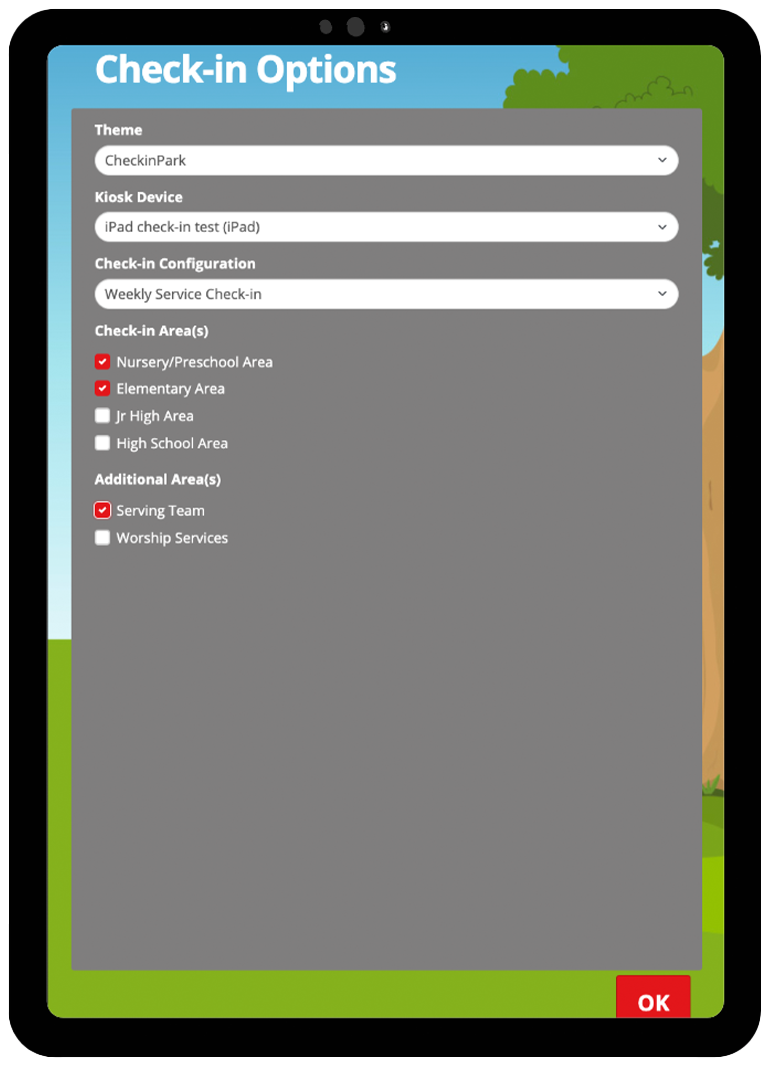
Now, let's envision that your check-in system is operating as smoothly as a high-performance engine. Yet, despite this, you still receive a text message in the middle of the service from the children's department. Upon investigation, you discover that the individual responsible for configuring the check-in kiosk made incorrect selections on the screen. All you need to do is choose the Theme, Kiosk Device, Configuration, Check-in Areas, and perhaps Additional Areas. Simple, right?
Frequently, a single kiosk caters to multiple ministry areas. The setup demands for weekend Kids' check-in can significantly differ from those for weekly childcare check-in during adult classes. Transitioning between these setups is susceptible to errors. You can pass kiosk and ministry options through the URL parameters and save these options as quick links, as described in the Rock RMS documentation, to help mitigate these issues.
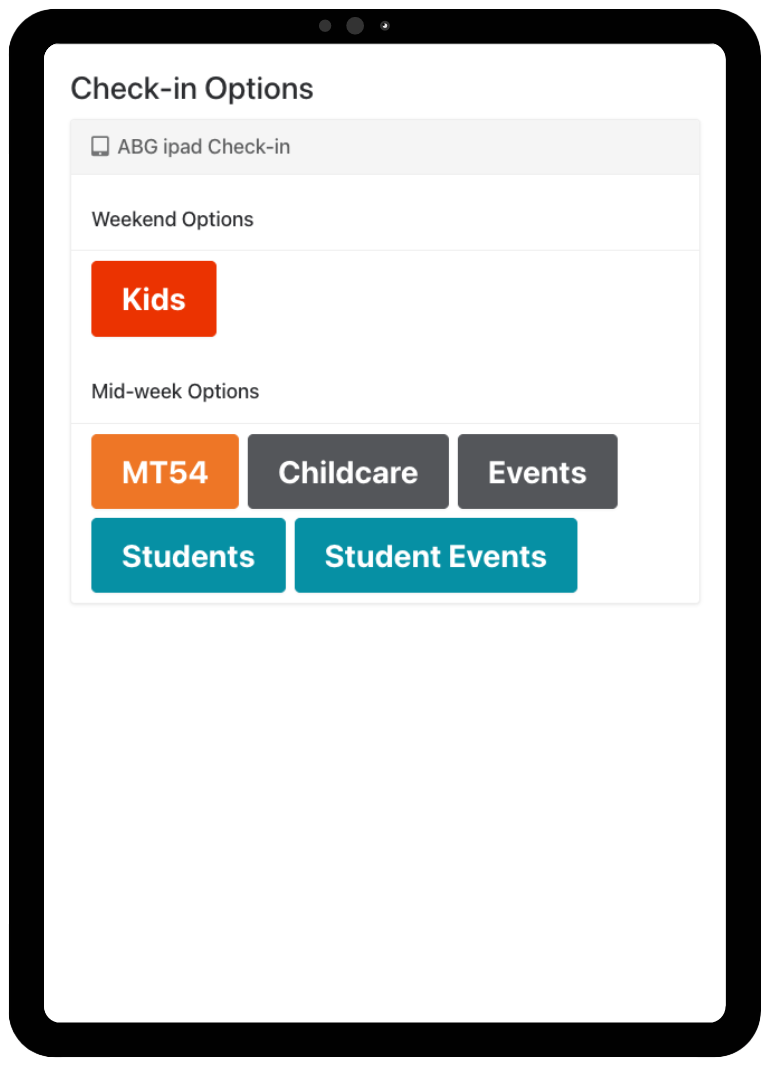
There's an alternative solution. Picture a button-based interface that your check-in team can utilize for setup. One interface can serve multiple ministries, kiosk options, and customized themes. The team simply selects the button relevant to the check-in they're initiating. Here's an example:
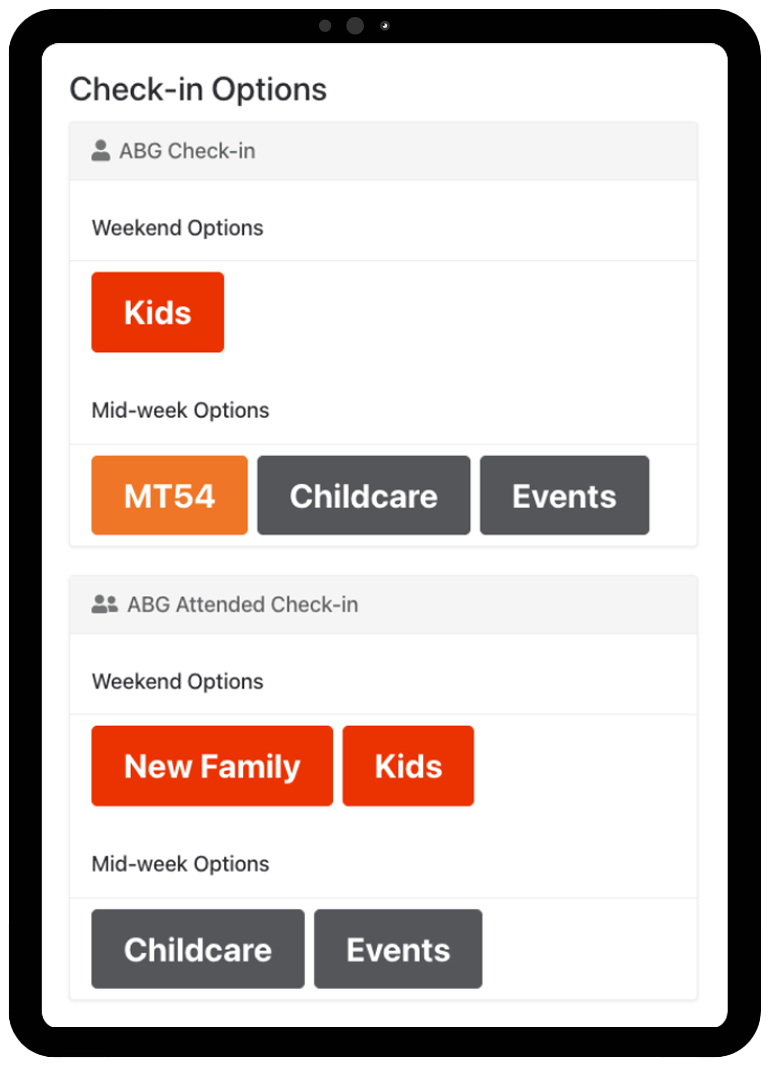
Some clients choose to customize kiosk options for each device. For example, your new family station might feature a kiosk with 'registration' enabled, making it easier to add new families. Additionally, these can be linked to different kiosks. Below is an example interface highlighting unique kiosk configurations:
At the top of each check-in launcher, we can include two links. One link provides quick access to the Content Channel Details that supply content for the check-in launcher. The other link provides a quick view report of the settings behind each launcher section and button. This provides assurance that settings are correct and offers potential troubleshooting if needed. These links are secured to allow access only to the designated security role for that team.
With this approach, your teams can say goodbye to guesswork. Moreover, it effectively tackles the challenge of devices serving multiple events within a single day or week. For example, the same device might be used by kids in the morning and by students in the evening.
Here's How it Works in Detail:
We're utilizing content channels and a custom check-in launcher page for the check-in interface. These content channels seamlessly connect all the dots between your check-in configurations and the buttons on your interface.
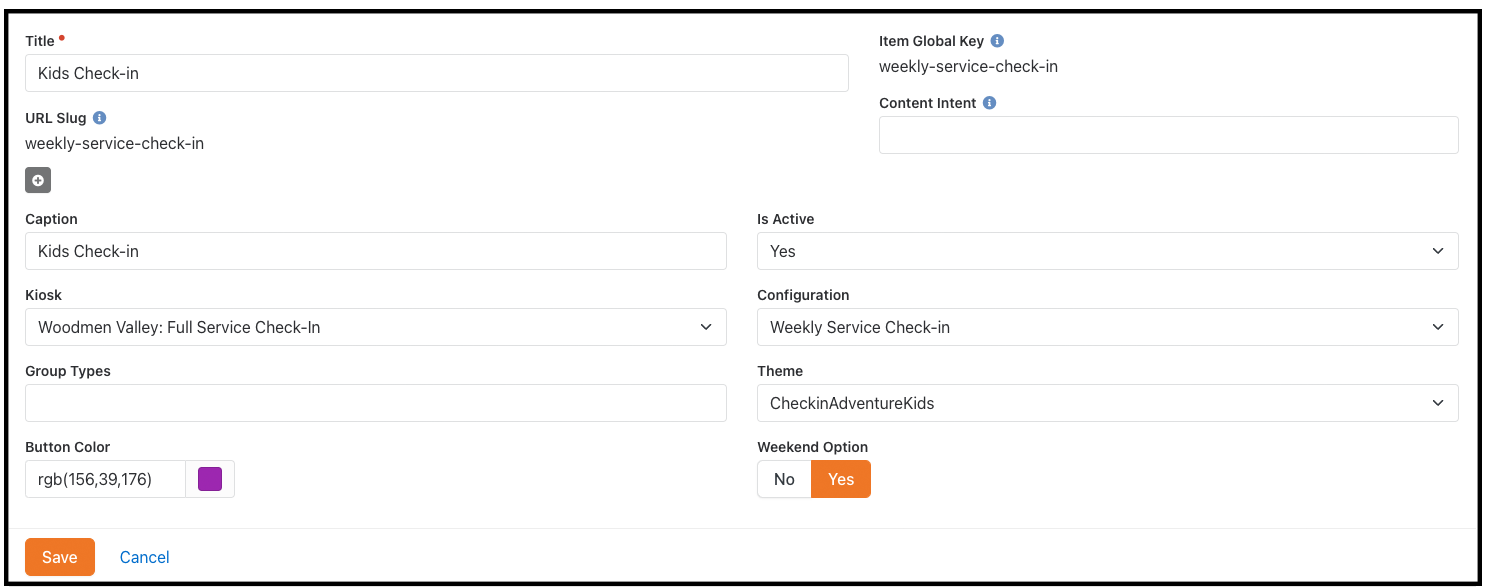
Internally, your staff will have the capability to use the content channels to update button colors, wording, and even the background used for their check-in. They will have access to something that looks like this to manage the different aspects of check-in:
This interface can be employed with both new and existing check-in configurations. Whether it's enhancing the experience for new families or ensuring seamless transitions between events, this interface offers a comprehensive solution to optimize check-in.
What's next?
The installation of this content channel-linked interface can take 6-8 hours, depending on the complexity of your needs. If you believe this interface will benefit your church or you'd like to start a conversation, taking action is simple. Please click the button below to complete an interest form. This will help us get to know you better, and we'll reach out to you shortly!
*If you are not currently a client, a one-time fee will be incurred prior to the implementation of any features.
*Looking Ahead
Don't miss next month's blog
Designing for Efficiency: More UI Enhancements!
We'll explore exciting User Interface (UI) enhancements designed to make your workflow smoother and more intuitive. Discover how new attendance dashboards and dot charts provide real-time data, making it easier to manage check-ins and refine scheduling. Learn about innovative tools that allow non-technical users to effortlessly find and manage group types within the database. These enhancements are all about saving time and reducing frustration, ensuring that your work can be as efficient and enjoyable as possible.